 I wanted to try out more stamps from my Christmas stash, and had so much fun with my first try that I decided to go all-out and try 3 Splitcoast Stampers challenges with the same 3 stamps: a child looking out a window on snow, an ornament leaf and a sentiment. I made my first tag with scraps from the first card. I liked the result of the 2nd card's color combination so much that I decided to make a matching tag for that one as well.
 Tag #1: SplitCoastStampers MFT Wednesday Stamp Club challenge #MFTWSC10272010: Tag You're It! Supplies: Polar White Flowersoft & glue, Recollections cardstock, Cricut personal cutter, Walk in My Garden Cricut cartridge, Tim Holtz scissors, Fiskars papercutter & corner punch, silicon stamps from my Christmas stash, StazOn ink
Card #1: SplitCoastStampers sketch challenge #SC303 Supplies: Polar White Flowersoft & glue, Recollections cardstock, Cricut personal cutter, SCAL2 software, Tim Holtz scissors, Fiskars papercutter & corner punch, silicon stamps from my Christmas stash, StazOn ink

 Tag #2: SplitCoastStampers MFT Wednesday Stamp Club challenge #MFTWSC10272010: Tag You're It!
Supplies: Polar White Flowersoft & glue, Core'dinations & Recollections cardstock, Cricut personal cutter, Walk in My Garden Cricut cartridge, Tim Holtz scissors, Fiskars papercutter, silicon stamps from my Christmas stash
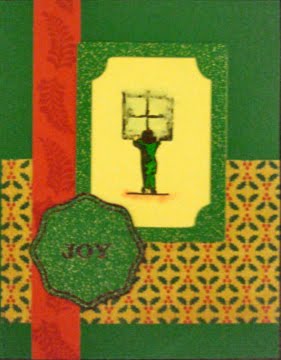
Card #2: SplitCoastStampers Color Combo challenge #CC294: light pink, light aqua blue, kraft, black + Lace
Supplies: Polar White Flowersoft & glue, Core'dinations & Recollections cardstock, DCWV Christmas stack paper, Cricut personal cutter, Tim Holtz scissors, Fiskars papercutter, silicon stamps from my Christmas stash, StazOn ink, chalks from Pebbles, Inc.
![cg says [something loudly]](http://4.bp.blogspot.com/-NYKVi70Q_N4/Tk3LNv8-l6I/AAAAAAAACYw/5BajE7uH_JI/s1600/blogheader.gif)
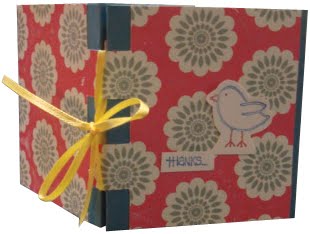
 Inspiration: Critter Sketch #37 + Buttons


